

How To Create A Virtual Xp Machine In Windows 7
Table of Contents
- Introduction
- How to determine if the processor supports hardware virtualization
- Configure your bios to support hardware virtualization
- Download and install Virtual PC and Windows XP Way for Windows seven
- Starting Windows XP Manner for the first time
- How to install and launch Windows XP Manner applications
- Modify integration features and settings
- Change XP Way Virtual Machine Settings
- Conclusion
Introduction
Windows Virtual PC is a downloadable add-on to Windows 7 Professional, Ultimate, or Enterprise that allows you to run a Windows XP environments from inside Windows 7. Windows XP Manner, which requires Windows Virtual PC, is a prepackaged fully activated copy of Windows XP Professional with Service Pack three installed. With both of these programs installed, you tin then run Windows XP in Windows vii so that you can go on to use programs that were developed for Windows XP but no longer run in Windows 7.
In order to use the Virtual PC technology your computer's CPU must accept hardware virtualization support and information technology this hardware virtualization must exist enabled. For Intel processors this support is chosen Intel Virtualization Technology and for AMD processors it is called AMD-V. To decide if your processor has hardware virtualization please consult the post-obit department.
Also when reading this tutorial you will find that I use the word host often. This terms refers to the Windows 7 operating arrangement that the Windows XP Mode installation is running upon.
How to determine if the processor supports hardware virtualization
If y'all accept an Intel Processor then you demand to do the following to make up one's mind if your processor has hardware virtualization:
Showtime, download and install the Intel Processor Identification Utility and run it one your computer. Once the program is installed launch the plan. It tin be found under the Start Bill of fare -> All Programs -> Intel(R) Processor ID Utility. Once launched you will need to accept the license agreement and and then yous will be at a screen similar to the following epitome:
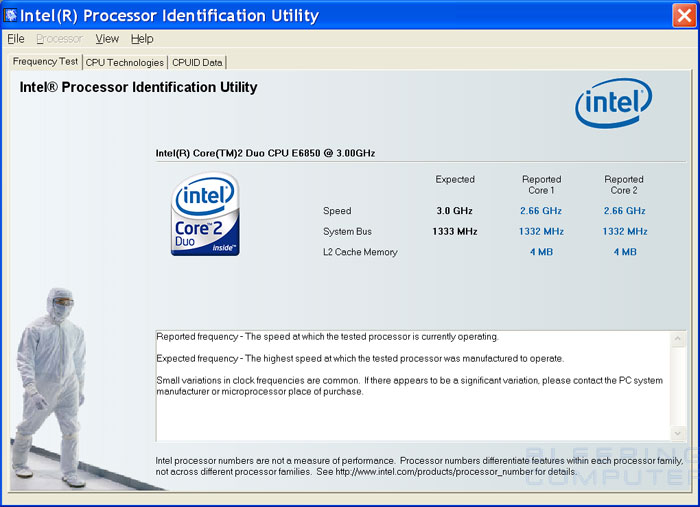
Intel Processor Identification Utility
Y'all should now click on the CPU Technologies tab and you lot will meet a screen as shown below.
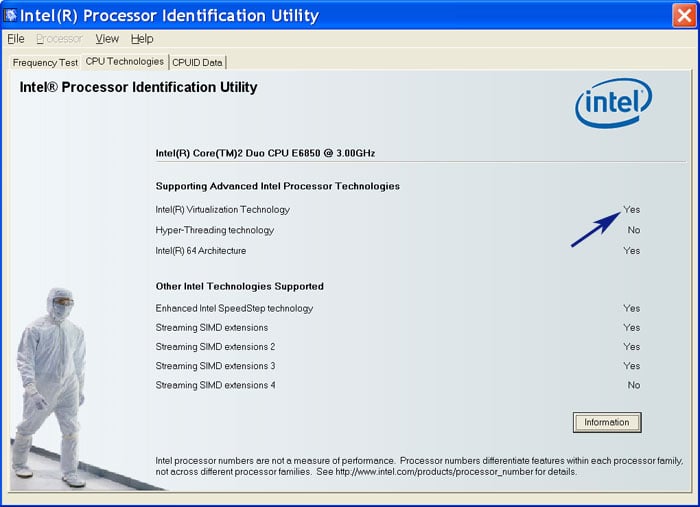
CPU Technologies Screen
On this screen, expect for the row labeled Intel(R) Virtualization Applied science, equally shown by the pointer in the prototype above. If information technology states Yes, and then you can use Virtual PC and Windows XP Mode in Windows 7, and should go along to the section where nosotros learn how to install it. If it does not say Yeah, and then you lot will not exist able to use Windows XP Fashion on your computer. You can now close the Intel Processor Identification Utility.
If you have an AMD Processor and then y'all demand to practice the following to determine if your processor has hardware virtualization:
If you have an AMD processor then y'all will need to download the AMD Virtualization Applied science and Microsoft Hyper-Five Organisation Compatibility Check Utility. Once downloaded, excerpt the files and navigate to the binder where the files are extracted. In order to run the utility in Windows 7, you will need to run it with elevated privileges. To do this, right-click on the amdvhyperv.exe file and select Run as ambassador. When the program loads information technology will tell you whether or not your AMD processor supports Hyper-V as shown below.
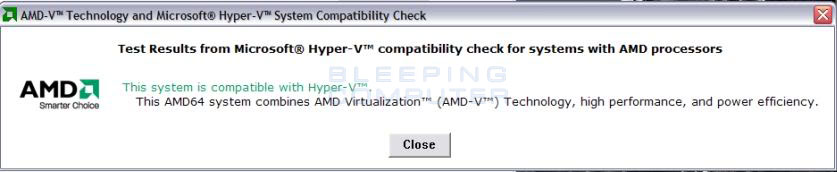
If it does not back up Hyper-Five, then you volition not exist able to apply Windows XP Mode in Windows vii.
Configure your bios to support hardware virtualization
If the in a higher place tests state that your processor does not back up hardware virtualization, information technology may exist you need to enable this feature your motherboard'due south BIOS. As motherboards have different methods of inbound the bios and configuring it, giving you step-by-step instructions is impossible. Typically, though, to enter your bios you volition boot your computer and then look for a prompt asking if yous would like to enter setup or configure your bios so stating what cardinal you lot need to press on your computer in order to exercise and so. Typically these keys are F1, F2, DELETE, F10, F11, or F12. I suggest that you lot turn off computer and so start it upward before attempting to access the BIOS, equally otherwise the screen may non always bear witness. On sure machines, y'all may also see a reckoner or motherboard brand logo that makes it so you cannot see the prompt to enter the BIOS. If you see a big logo covering the screen, simply press the ESC key on your keyboard in order to see your BIOS setup instructions.
In one case in the BIOS, you will demand to search for virtualization settings and make sure they are enabled. Every bit each brand or manufacturer of computers and motherboards, or even models of the same make, may have unlike locations every bit to where this setting is located in the BIOS, you will need to search through the settings till you observe it. Look for the settings for Virtualization, AMD-V, or Virtual Machine and make sure it is enabled. Once this is done, you can try the above tests again, and if they now say you support virtualization you tin can proceed with the rest of the tutorial.
Download and install Virtual PC and Windows XP Mode for Windows vii
Now that Virtualization is enabled on your estimator, nosotros need to download Windows Virtual PC and Windows XP Style. To practice this, visit the Windows Virtual PC Download page. One time at that place, gyre down till you come across Step 1 and select the type of Windows vii installed and your language. Then click on the Download Windows Virtual PC RC and the Windows XP Manner RC buttons to download each file.
Once the files are downloaded, you should install the Windows Virtual PC Beta first. This file is the smaller of the two, currently at 6.64 MB, is named Windows6.1-KB958559-x86.msu for 32 bit Windows or Windows6.i-KB958559-x64.msu for 64 bit Windows. When you double-click on the file, it will scan your computer for a certain update, and if not plant, will prompt you to download the KB958559 update as shown beneath.
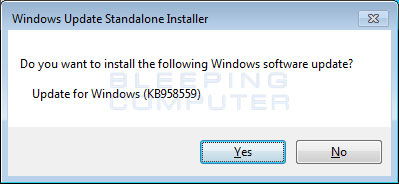
Install the KB958559 Windows 7 update
You lot should click on the Yes key to let this update to be installed. When the update has finished installing, you will be at the license screen. Click on the I accept button to finish the installation of the program. When it has finished installing, it will prompt yous to reboot your computer. Please permit it to exercise so.
When you are back at your desktop, you lot should at present double-click on the Windows XP Fashion Beta installation file, which is named WindowsXPMode_en-united states of america.exe. When the installation program opens, follow the prompt to install the programme onto your computer. The installation may take a while as the package is over 400MB, and so please exist patient. While installing, Windows will brandish a User Account Control prompt request if you wish to have this software installed on the computer. At this prompt, click on the Yes button to continue. Subsequently the Windows XP Mode software has been installed, press the Finish push button and Windows XP Mode will start. Please continue to the next department to learn how to configure Windows XP Fashion when information technology runs for the first time.
Starting Windows XP Mode for the start time
When you start Windows XP Manner for the kickoff you will need to first have the license agreement and and then press the Next button. Y'all will at present be at a screen, every bit shown beneath, where you are asked to input the password for the user that XP Mode programs will run under.
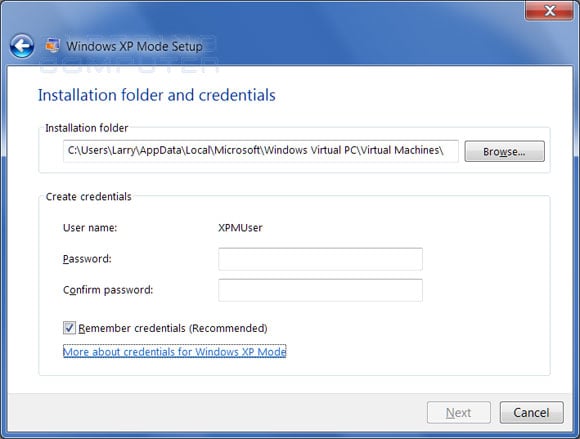
XP Style Credentials
Create a password and enter it into the two password fields. If you do not desire to enter the countersign every time yous start Windows XP Way, and so put a checkmark in the Retrieve credentials checkbox. When done, click on the Next button.
You will now exist asked if you would similar to enable Automatic Updates. Yous should put a checkmark in the Help protect my computer by turning on Automatic Updates then click on the Start Setup button. Windows Virtual PC will at present setup Windows XP Mode for its first fourth dimension use. This may take a while, so please be patient.
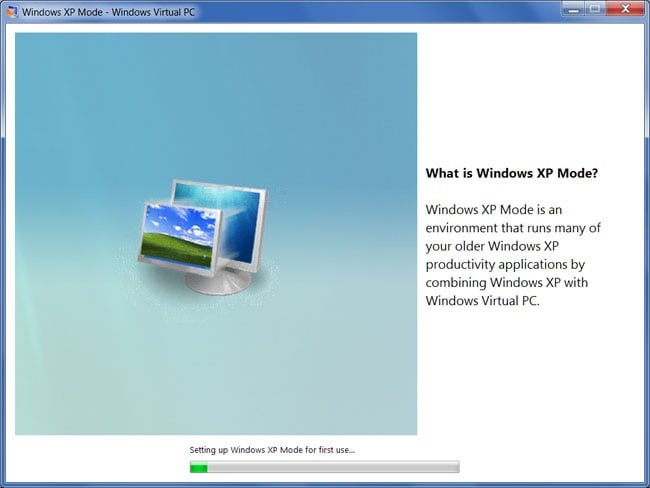
Windows XP Style being setup for its outset use
When the setup has been completed you volition at present be in Windows XP Mode and will exist presented with a Windows XP Professional desktop.
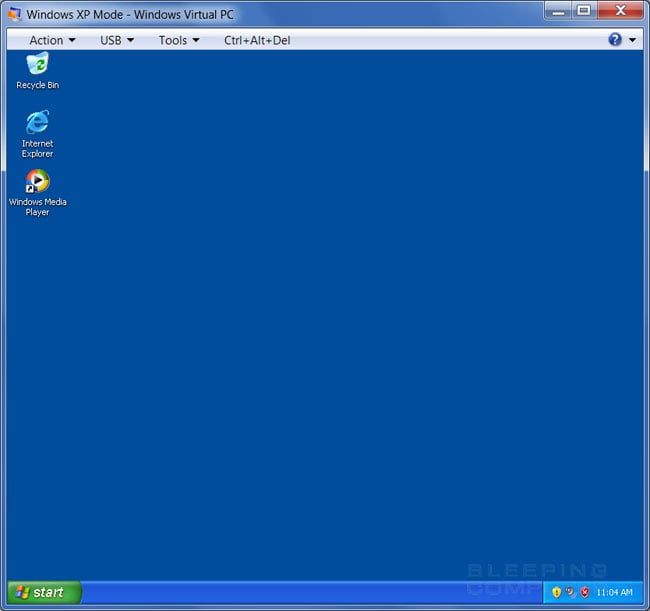
Windows XP Way Desktop
While Windows XP Style is running, the Virtual PC program volition automatically integrate all of your host computer's resource into Windows XP Fashion so that you can utilise them. This includes your your computer's DVD/CD drives, hard drives, sound bill of fare, printers, and USB devices.
To shut Windows XP Style you lot tin click on the Deportment card and select Close to hibernate your session and close the window. If you would like to actually shutdown the Windows XP Manner, you need to click on the Ctrl+Alt+Del menu and then click on the Shut downwardly push on the screen that pops upwardly.
To star Windows XP Way once again you simply click on the Start Menu, select All Programs, roll down to Windows Virtual PC, and then select Windows XP Mode.
How to install and launch Windows XP Way applications
To install applications in Windows XP Mode, you would install them like they usually do. You tin can either download the programs over the network or the spider web and install them direct from the Windows XP Manner hard drives or you can install them via your host'south shared resource like the CD/DVD drives attached to your host computer. The but difference is that the applications will be running in a virtual Windows XP environment and therefore will run even if they are not compatible with Windows 7. This volition allow you lot to install whatsoever legacy applications that y'all need to continue to have available.
A characteristic of Windows XP Mode is that any application you install that uses Windows Installer will also have a shortcut automatically added to the a Windows XP Mode Applications binder in your Windows 7 Start Carte du jour. If the program you install does not appear in the host's Windows XP Manner Applications folder, you can manually make a shortcut appear by creating a shortcut to the plan in the C:\documents and settings\All Users\Commencement Carte du jour\Programs binder on your Windows XP Style installation. You and so need to log off in Windows XP Mode and the program will now appear in the Windows XP Style Applications folder on your host figurer.
When you launch these programs from the Start Menu, they will appear as a normal program running on your computer rather than 1 running in a virtual desktop. In fact, when yous launch one of these applications you will never encounter the Windows XP Style desktop and the application volition be running directly on your normal desktop. To launch Windows XP Mode applications y'all would need to navigate via the Start Bill of fare to All Programs, curl down to Windows Virtual PC, and then Windows XP Mode Applications. Under that sub binder you will run across a list of applications that you tin direct launch from within Windows 7.
When running XP Mode Applications straight from the desktop, it is important to understand that Windows XP Mode is started, just is being run behind the scenes then that the actual desktop is hidden. The running XP Mode Applications, though, still use the data and drives that are normally on the Windows XP Way desktop. That ways any XP Style programs will be opening the XP Manner drives, and not the local drives of your host Windows seven operating arrangement unless they are shared.
When you are done running an XP Style application, you lot only shut it like normal. This will put the Windows XP Fashion virtual pc into a hibernating land.
It is also important to note that when starting XP Mode applications, they volition start much faster if XP Manner is a hibernating state rather than shutdown. Therefore, if you routinely use XP Mode applications, I propose you practice not shut downwards your XP Mode when not using it and instead leave it hibernating.
Modify integration features and settings
When running XP Manner it is possible to change the hardware and data that is automatically integrated into the virtual pc. To alter these settings, when in the XP Mode desktop click on the Tools menu and and so select Settings.... You will now exist at the virtual pc settings screen and should click on the Integration Features category. From here you can specify what hardware and features you would like to integrate, or share, with your XP Mode desktop.
These features are:
- Audio - This should remain unchecked so that you have better functioning. It should be noted that even with this unchecked, any sound from the XP Fashion desktop will however play through your host's audio card.
- Clipboard - If this is enabled and so y'all will exist able to copy and paste betwixt XP Fashion and your normal desktop.
- Printer - Shares your host's printer with XP Way.
- Smart Cards - Allows XP Mode to admission the host's smart cards.
- Drives - Allows XP Way to access the host's drives, which include hard drives, CD/DVD drives, and removable media.
Whatever changes y'all make to the settings above will be persistent each time you commencement XP Mode. On the other paw, if yous need to disable the integration for a particular session y'all can click on the Tools menu and then select Disable Integration Features. This will brand it and then that you lot practice not accept access to any of the host'south resource. To enable admission to these resource, only click on the Enable Integration Features pick in the Tools carte du jour.
Change XP Manner Virtual Motorcar Settings
If y'all find that XP Mode is not running as fast as you would like, or you want to add more features, you need to tweak some settings in your Virtual PC settings for XP Mode. In gild to change these settings yous must first shut down XP Manner and then that it is non in a hibernating state. To practice this, click on the Ctrl+Alt+Del menu and and so click the Close down button on the screen that pops up.
When XP Mode has shut downwardly, click on the Kickoff Bill of fare, select All Programs, ringlet down to Windows Virtual PC, and so select the Windows Virtual PC icon. You should now see a list of your Virtual PCs, including Windows XP Mode. Right-click on Windows XP Mode and then select Settings. Now that Windows XP Mode is shut down, you tin can change the settings for your virtual auto.
Settings that y'all may desire to consider changing to increase performance and reliability are:
- Memory - If yous find that your applications are running slowly, then you lot may want to crash-land this up so that your applications have access to more system memory.
- Difficult Disks - Yous are able to add 2 more hard disks to your Windows XP Way. So if yous need to add another drive to your Windows XP Mode, you can do and so here. This will allow you to create a 2d deejay on another physical drive in your figurer to enhance functioning.
- Disengage Disks - Disengage disks allow you to create a base prototype of your Windows XP Mode installation and then save all changes into an disengage deejay. Then if you ever need to outset over from your base image, you simply become back into settings and discard the changes in your undo disk. The side by side fourth dimension you start Windows XP Style, you will be back at the base of operations setup with all of the changes you accept made discarded. I suggest that everyone turn this option on as it merely increases the rubber of your Windows XP Mode installation.
Once y'all accept finished making your changes, simply click on the OK button to salve the changes. When y'all adjacent offset Windows XP Mode, these settings volition now exist in outcome.
Conclusion
Without a doubtfulness, Windows XP Mode is a pregnant feature for Windows 7 as XP Fashion allows you lot to run programs that are no longer compatible with Windows 7. Whether these are concern applications or older games, Microsoft offering a fully licensed Windows XP Professional person to utilise on your Windows 7 desktop is a an excellent tool. For more than discussion on how to utilise, why to apply, and supporting Windows XP Way, please see our Windows 7 forum.
Source: https://www.bleepingcomputer.com/tutorials/use-windows-xp-mode-in-windows-7/
Posted by: evansupow1963.blogspot.com
0 Response to "How To Create A Virtual Xp Machine In Windows 7"
Post a Comment